With Notion's immense versatility comes the ability to share pages with many types of users, at various levels of access.
Fully understanding sharing is essential to keeping your information safe and your productivity at its highest. The nuances can be difficult to grasp, however. Below, we explain them simply and comprehensibly. If you're left with any lingering questions, feel free to respond to the newsletter or tweet @WilliamNutt.
Start with the video or dive into the text.
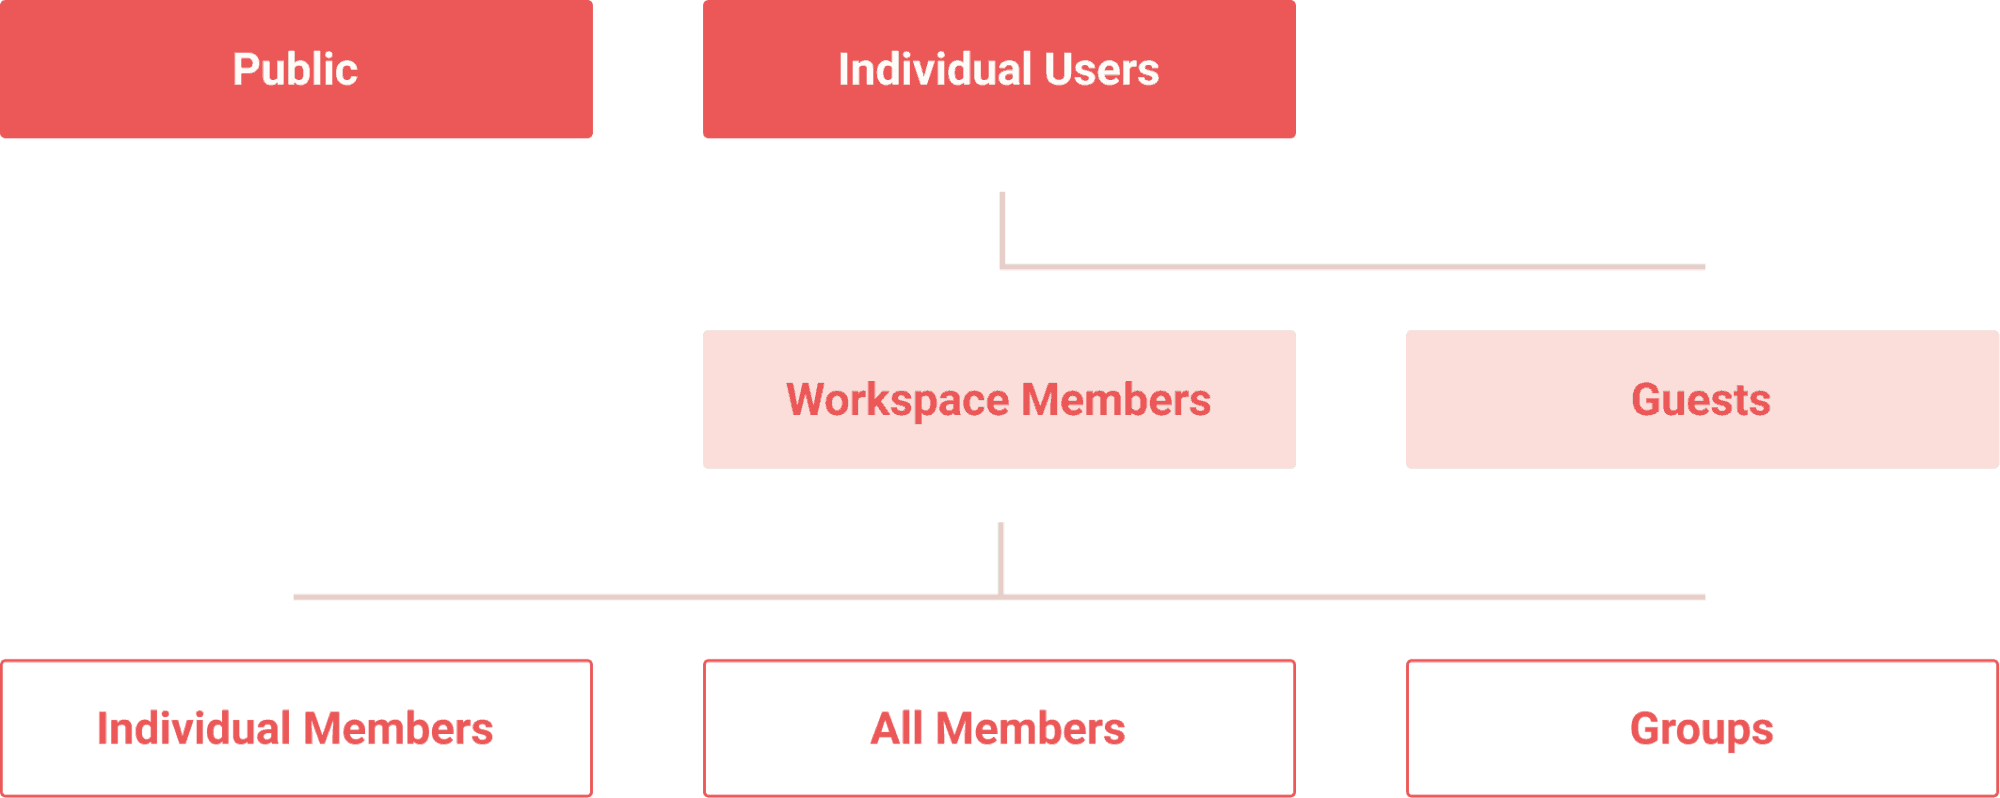
At the highest level, you can share Notion pages publicly or with individual users. Among those individual users, you can share pages with guests or members of your workspace. Within those members, you can share with all members, specific members or groups.
Based on who has access, a page will fall into one of three categories: Private, Shared and Workspace.
You'll understand each of these terms in no time.
Keep in mind that when you share a page, you share all of it's sub-pages, or the Page blocks within it. This does not include Link to Page blocks.
Similarly, when you share a database view or linked database, you share the full original database.
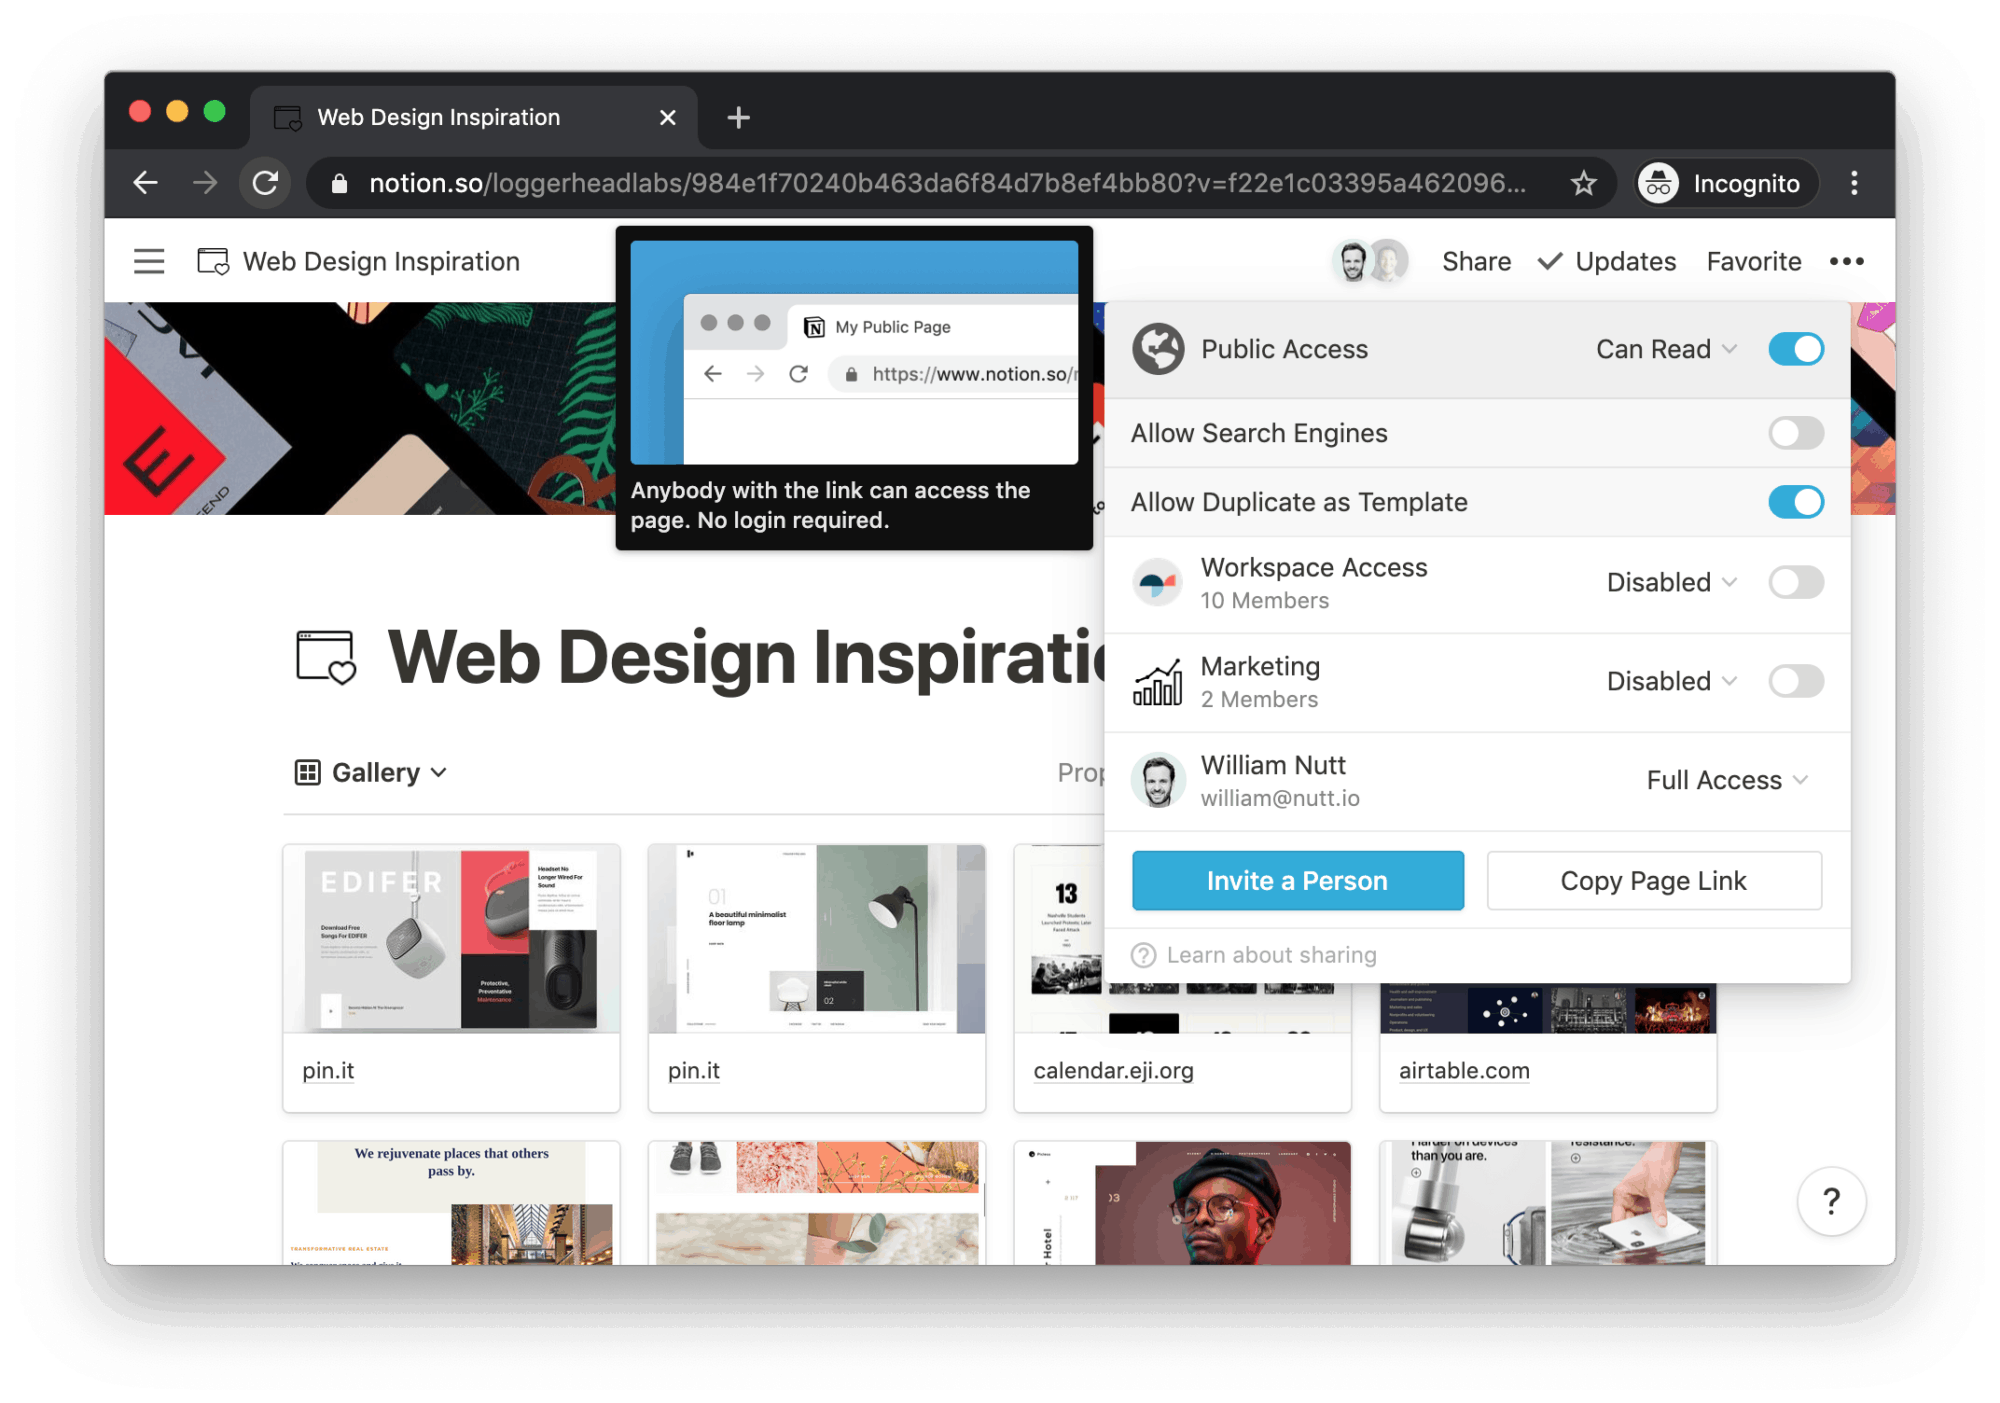
Granting Public Access to a page makes it accessible to anyone on the Internet. Each public page has a unique URL that makes it easy to share. You can also make them discoverable through search engines.
Share menu at the top-right.Public Access.Can Read, or only view the contents of your page. Choosing Can Comment allows any signed-in Notion user to comment on the content.When you share a page publicly, you can opt to Allow Search Engines. This lets Google and other search engines index your page, then display it within search results for relevant queries.
By default, your page can be duplicated by other Notion users for adaptation within their own workspaces. You can disable duplication by toggling Allow Duplicate as Template.
With your settings configured, you can use the Copy Page Link button to copy your page's unique URL, then paste it wherever you'd like to share your page.
To modify the share settings for a public page, return to the Share menu to toggle and reselect options as you wish.
Rather than publishing your page publicly, you can share it with specific Notion users. To access your page, those users must be signed in to their Notion accounts. Those without existing accounts are prompted to create one.
Users with access to any page in a workspace can be selected within the Person properties of databases.
When you share a page with a someone outside your workspace, that user becomes a guest of the workspace.
In a business context, guests typically include contractors, partners and clients.
Members are available on Team and Enterprise plans and typically include the team or group for which the workspace was created, such as your colleagues.
Like guests, members can be invited to specific pages. Unlike guests, members can access all pages that you grant Workspace Access.
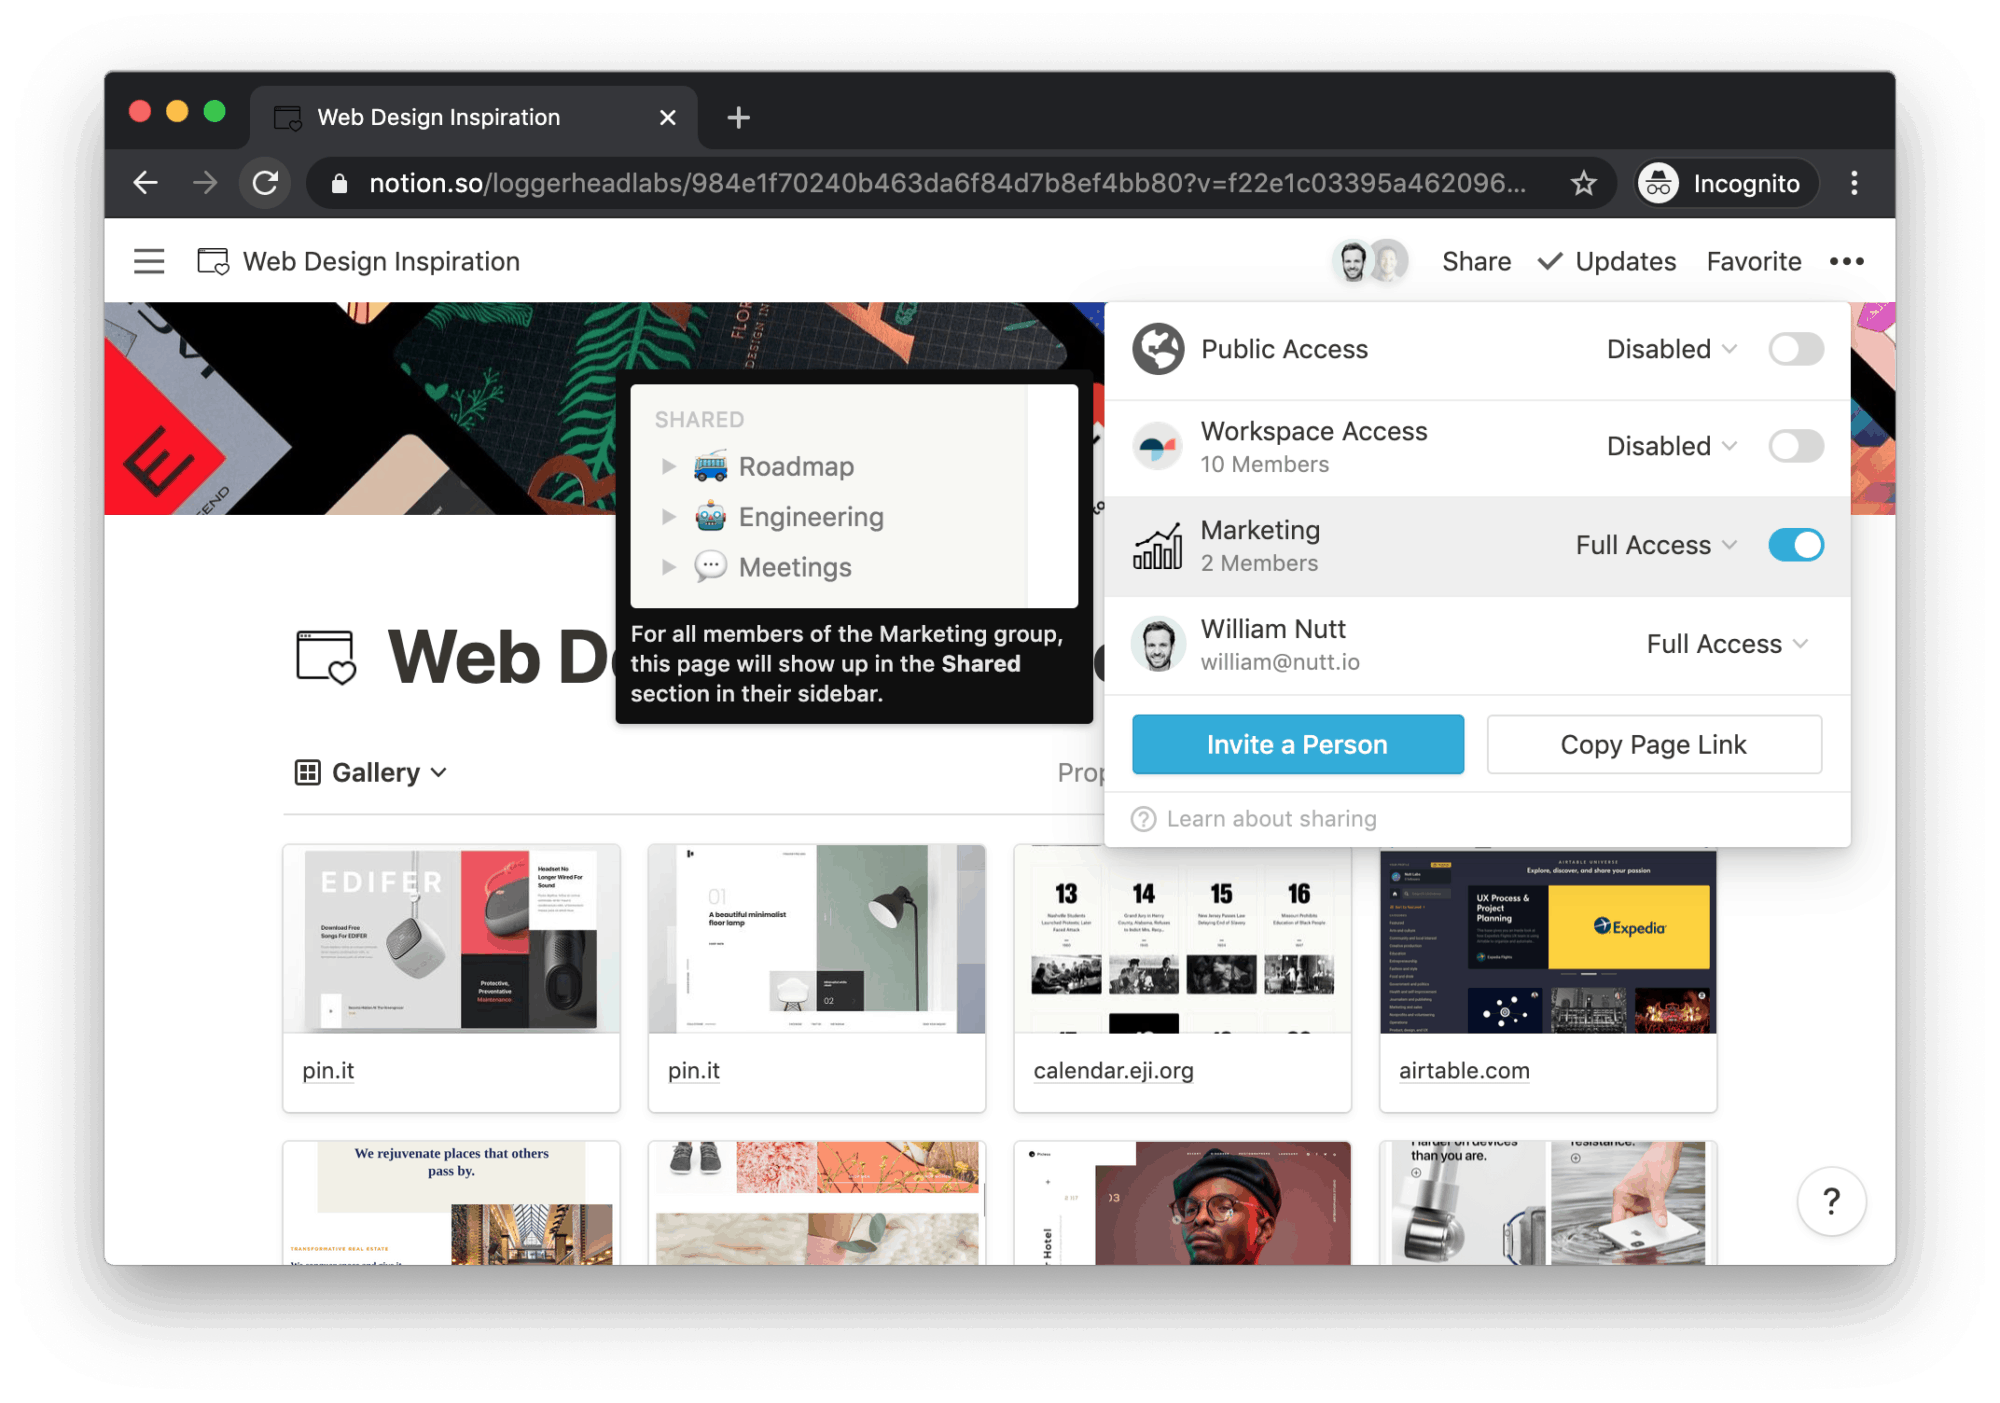
Admins can group members to make it easy to share pages with them as units. For example, you might share all marketing-centric pages with a "Marketing" group rather than sharing those pages with each member of the marketing team individually.
Each shared page falls into one of three categories: Private, Shared or Workspace. The pages at the top level of your hierarchy (containing no "parent" pages) are grouped within your sidebar by these categories.
A page's category refers to the way it's shared with members rather than guests or the public. For example, a Private page may be shared with a guest, but as soon as it's shared with a member, it becomes Shared.
When you invite guests, members and groups to a page, you'll specify an access level:
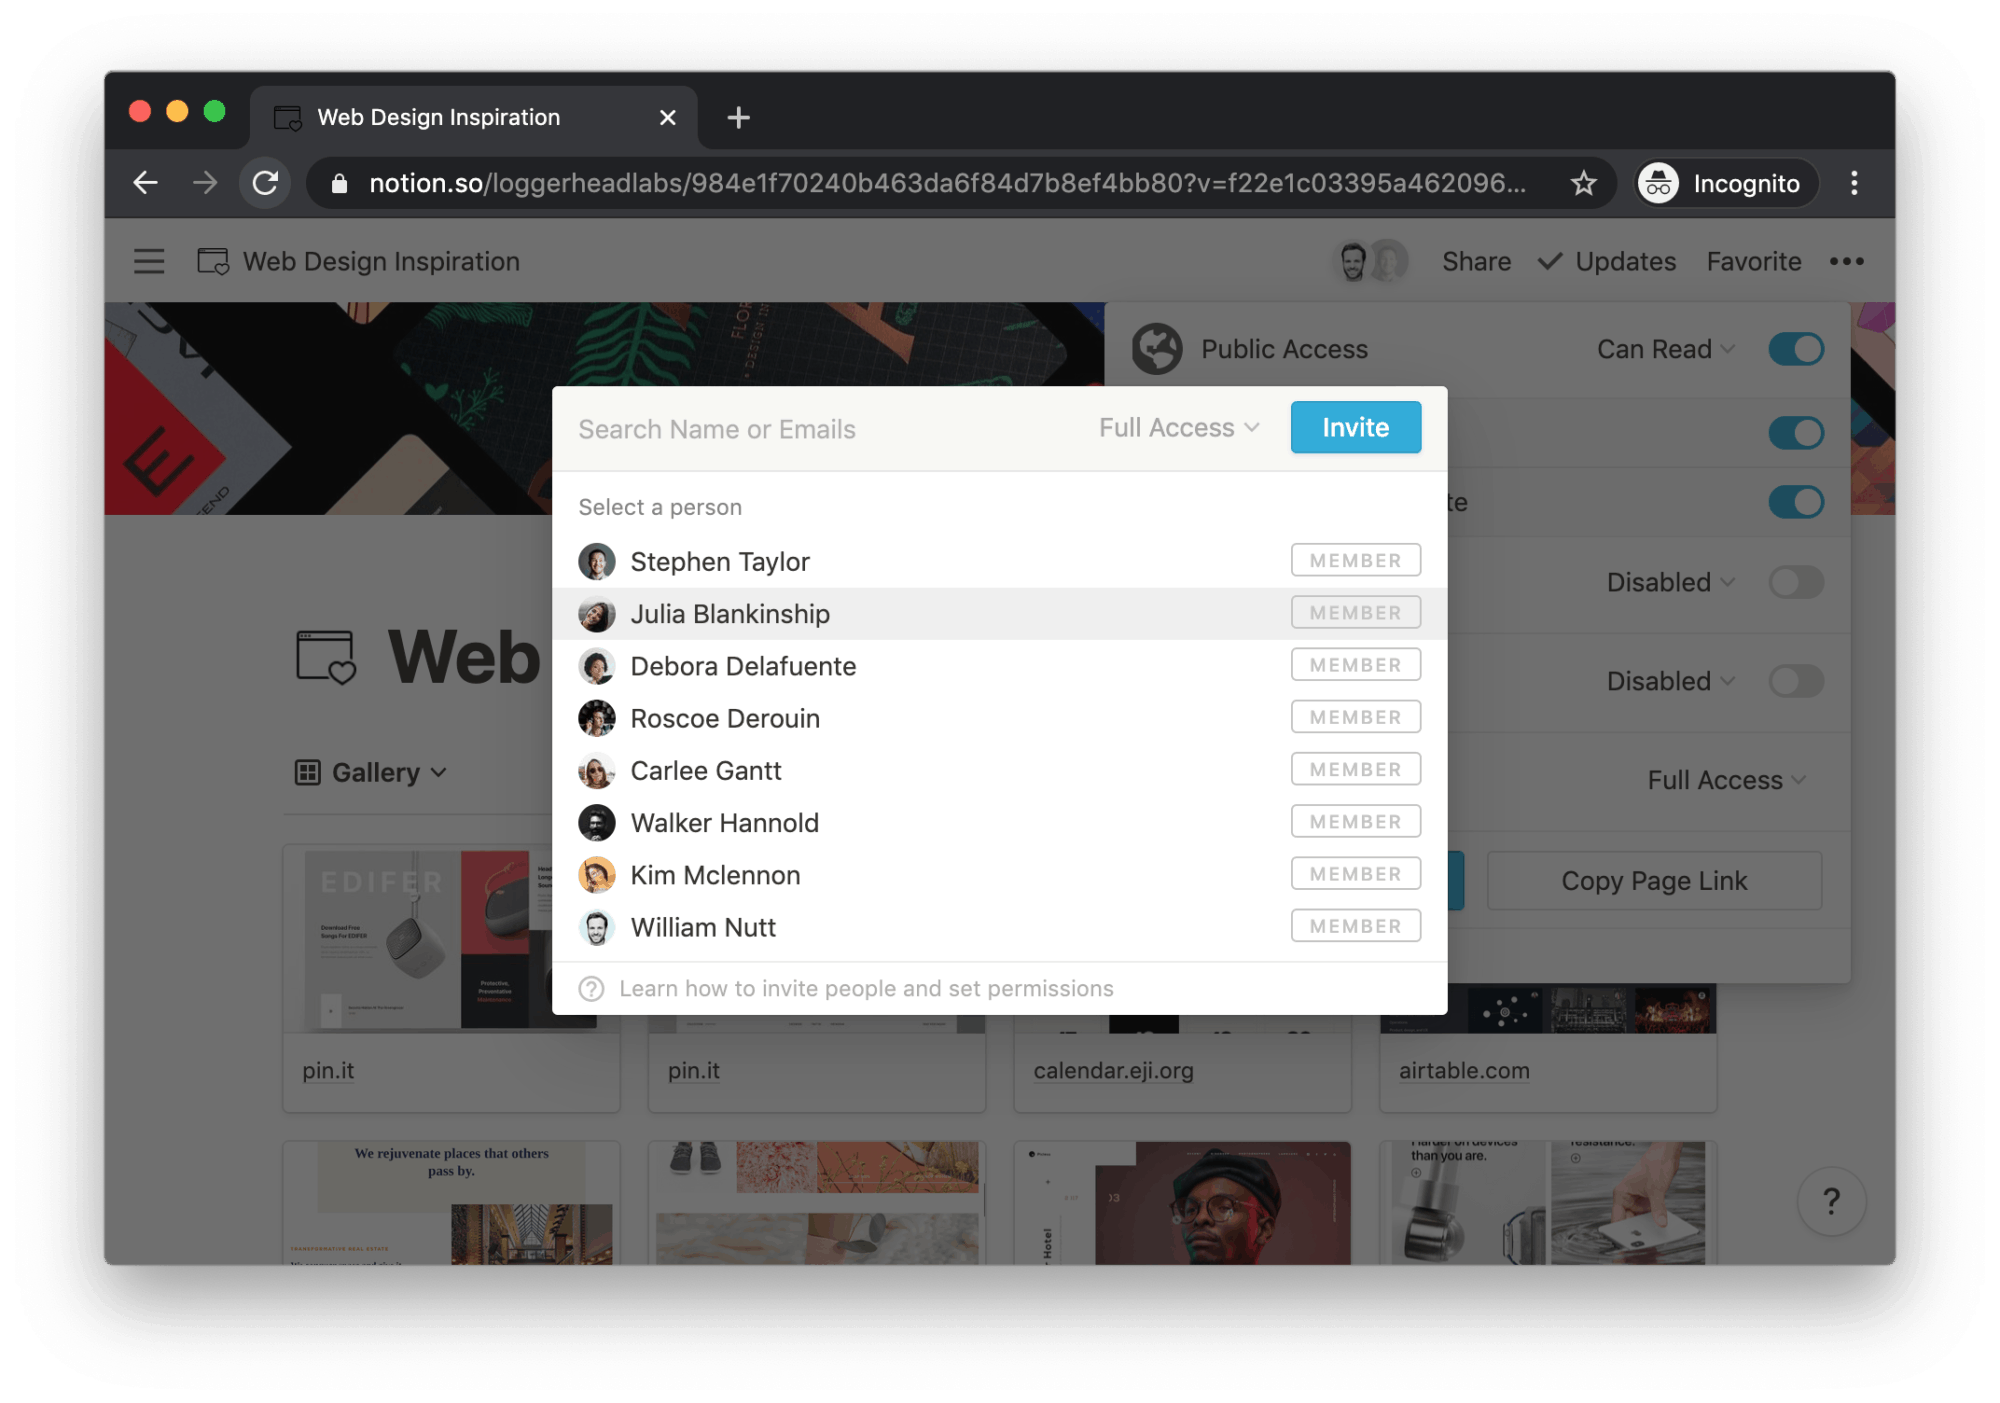
Share menu at the top-right.Invite a Person.Invite. The user will receive your invitation by email.If your page is at the top level of your workspace, it will appear within the Shared category of your sidebar.
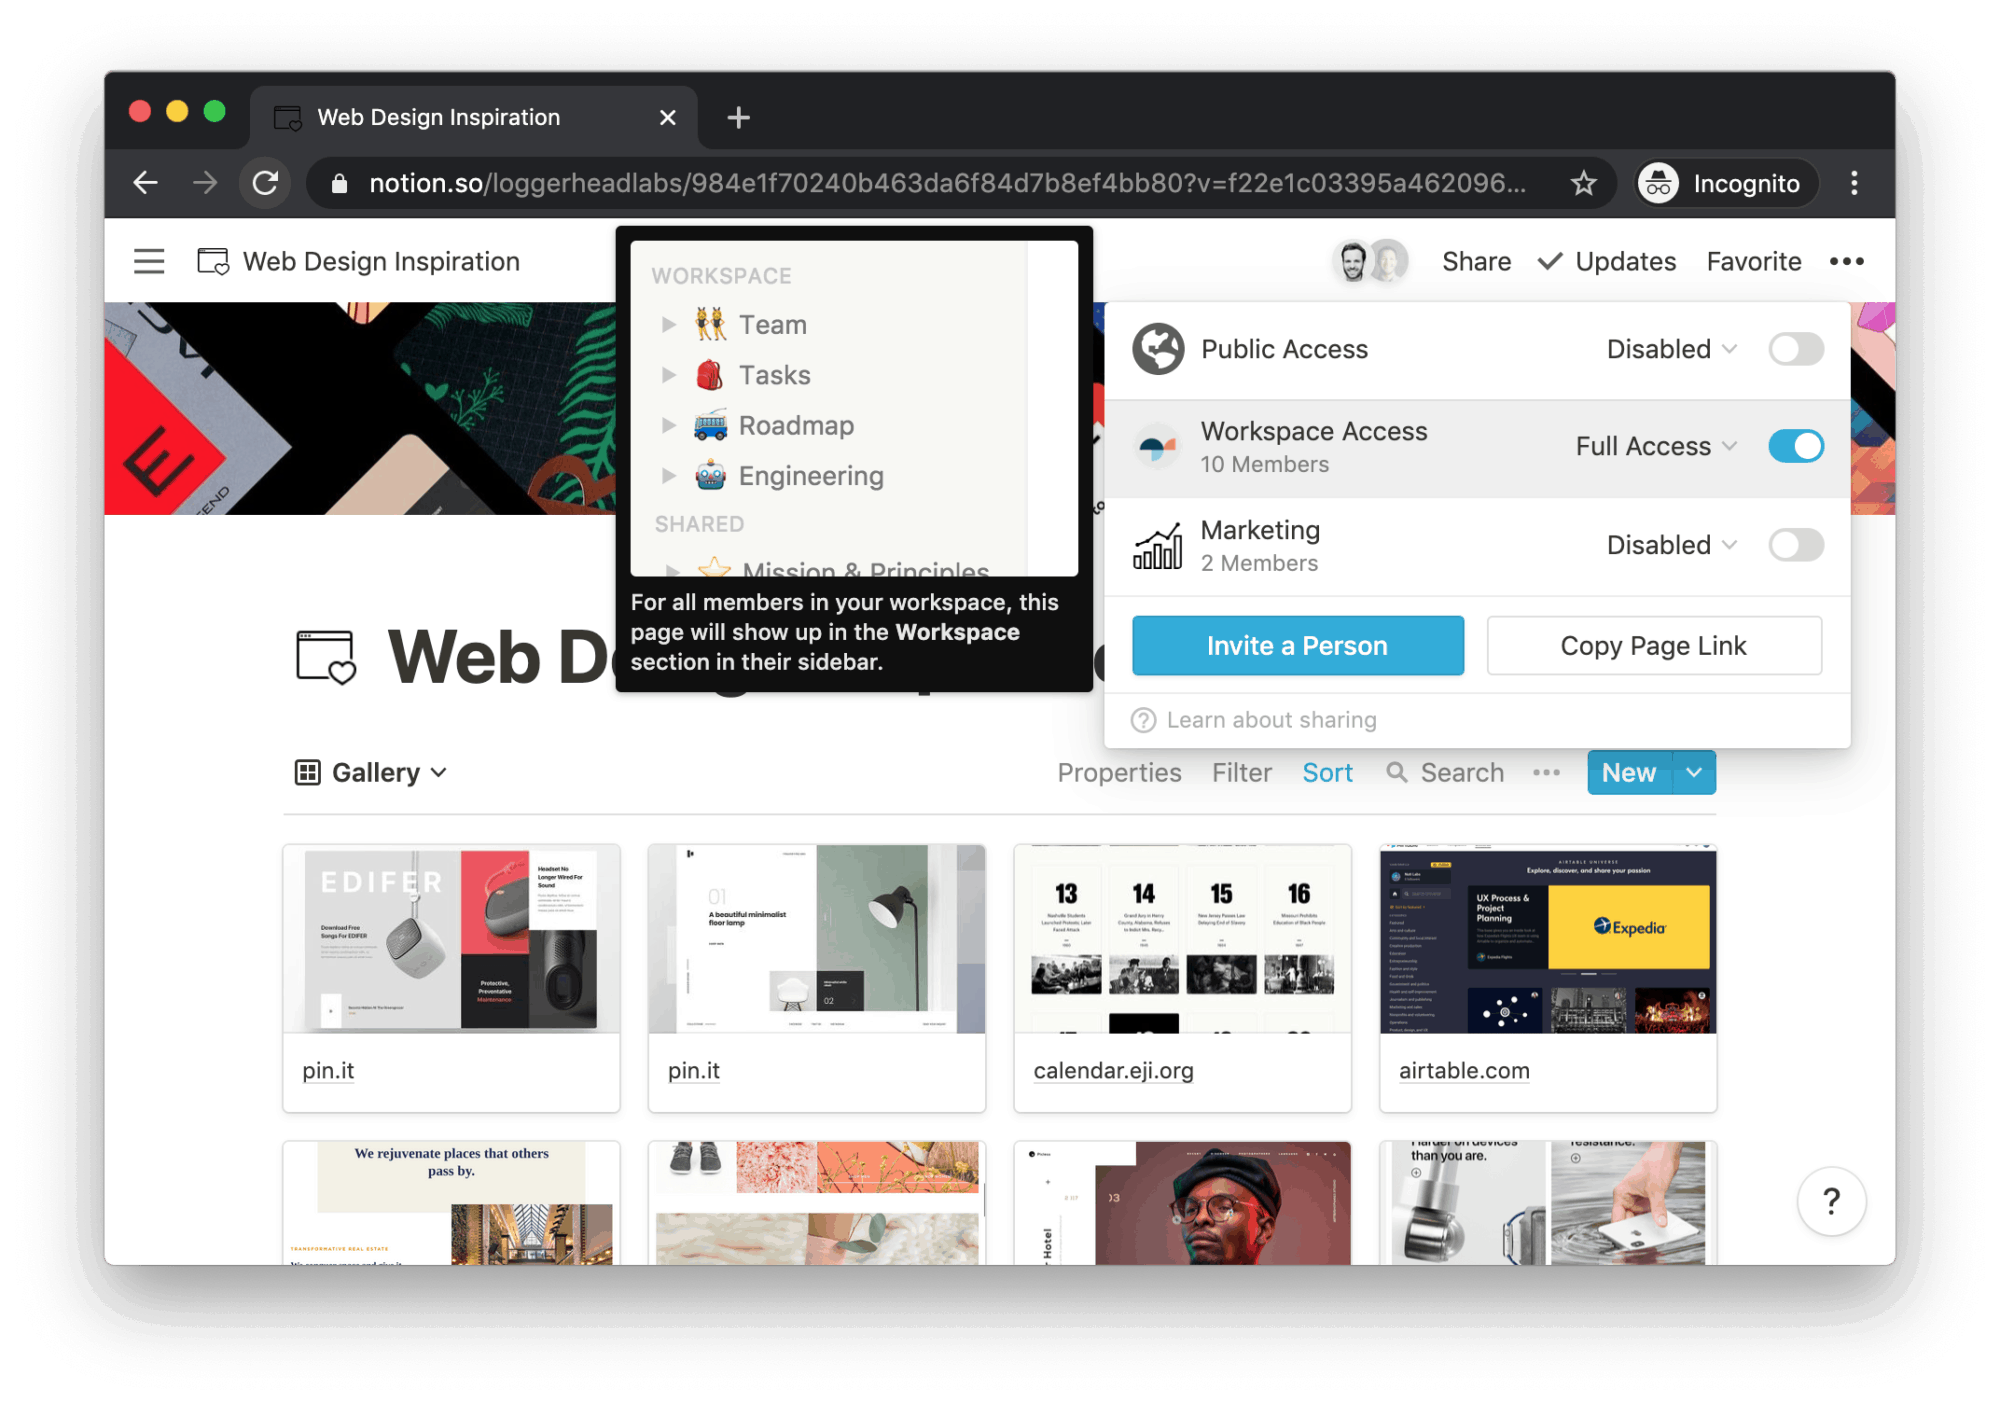
Within a page's Share menu, you can toggle Workspace Access to grant access to all members of your workspace. You can also choose an access level; the default is Full Access.
Workspace-shared pages appear within the sidebar's Workspace category for all members.
When an admin creates a group, the group is added to the Share menu of all pages below Workspace Access. There, you can toggle sharing and specify an access level for each group.
As with pages shared with individual members, those shared with groups appear within the Shared category of your sidebar.
When an invited user views the page for the first time, their avatars are added to the top-right — next to the Share menu. Hover over an avatar to see the user's name, email address, and time of last visit.
Avatars remain faded unless their users are actively viewing the page. As users edit the page, their avatars follow them from block to block.
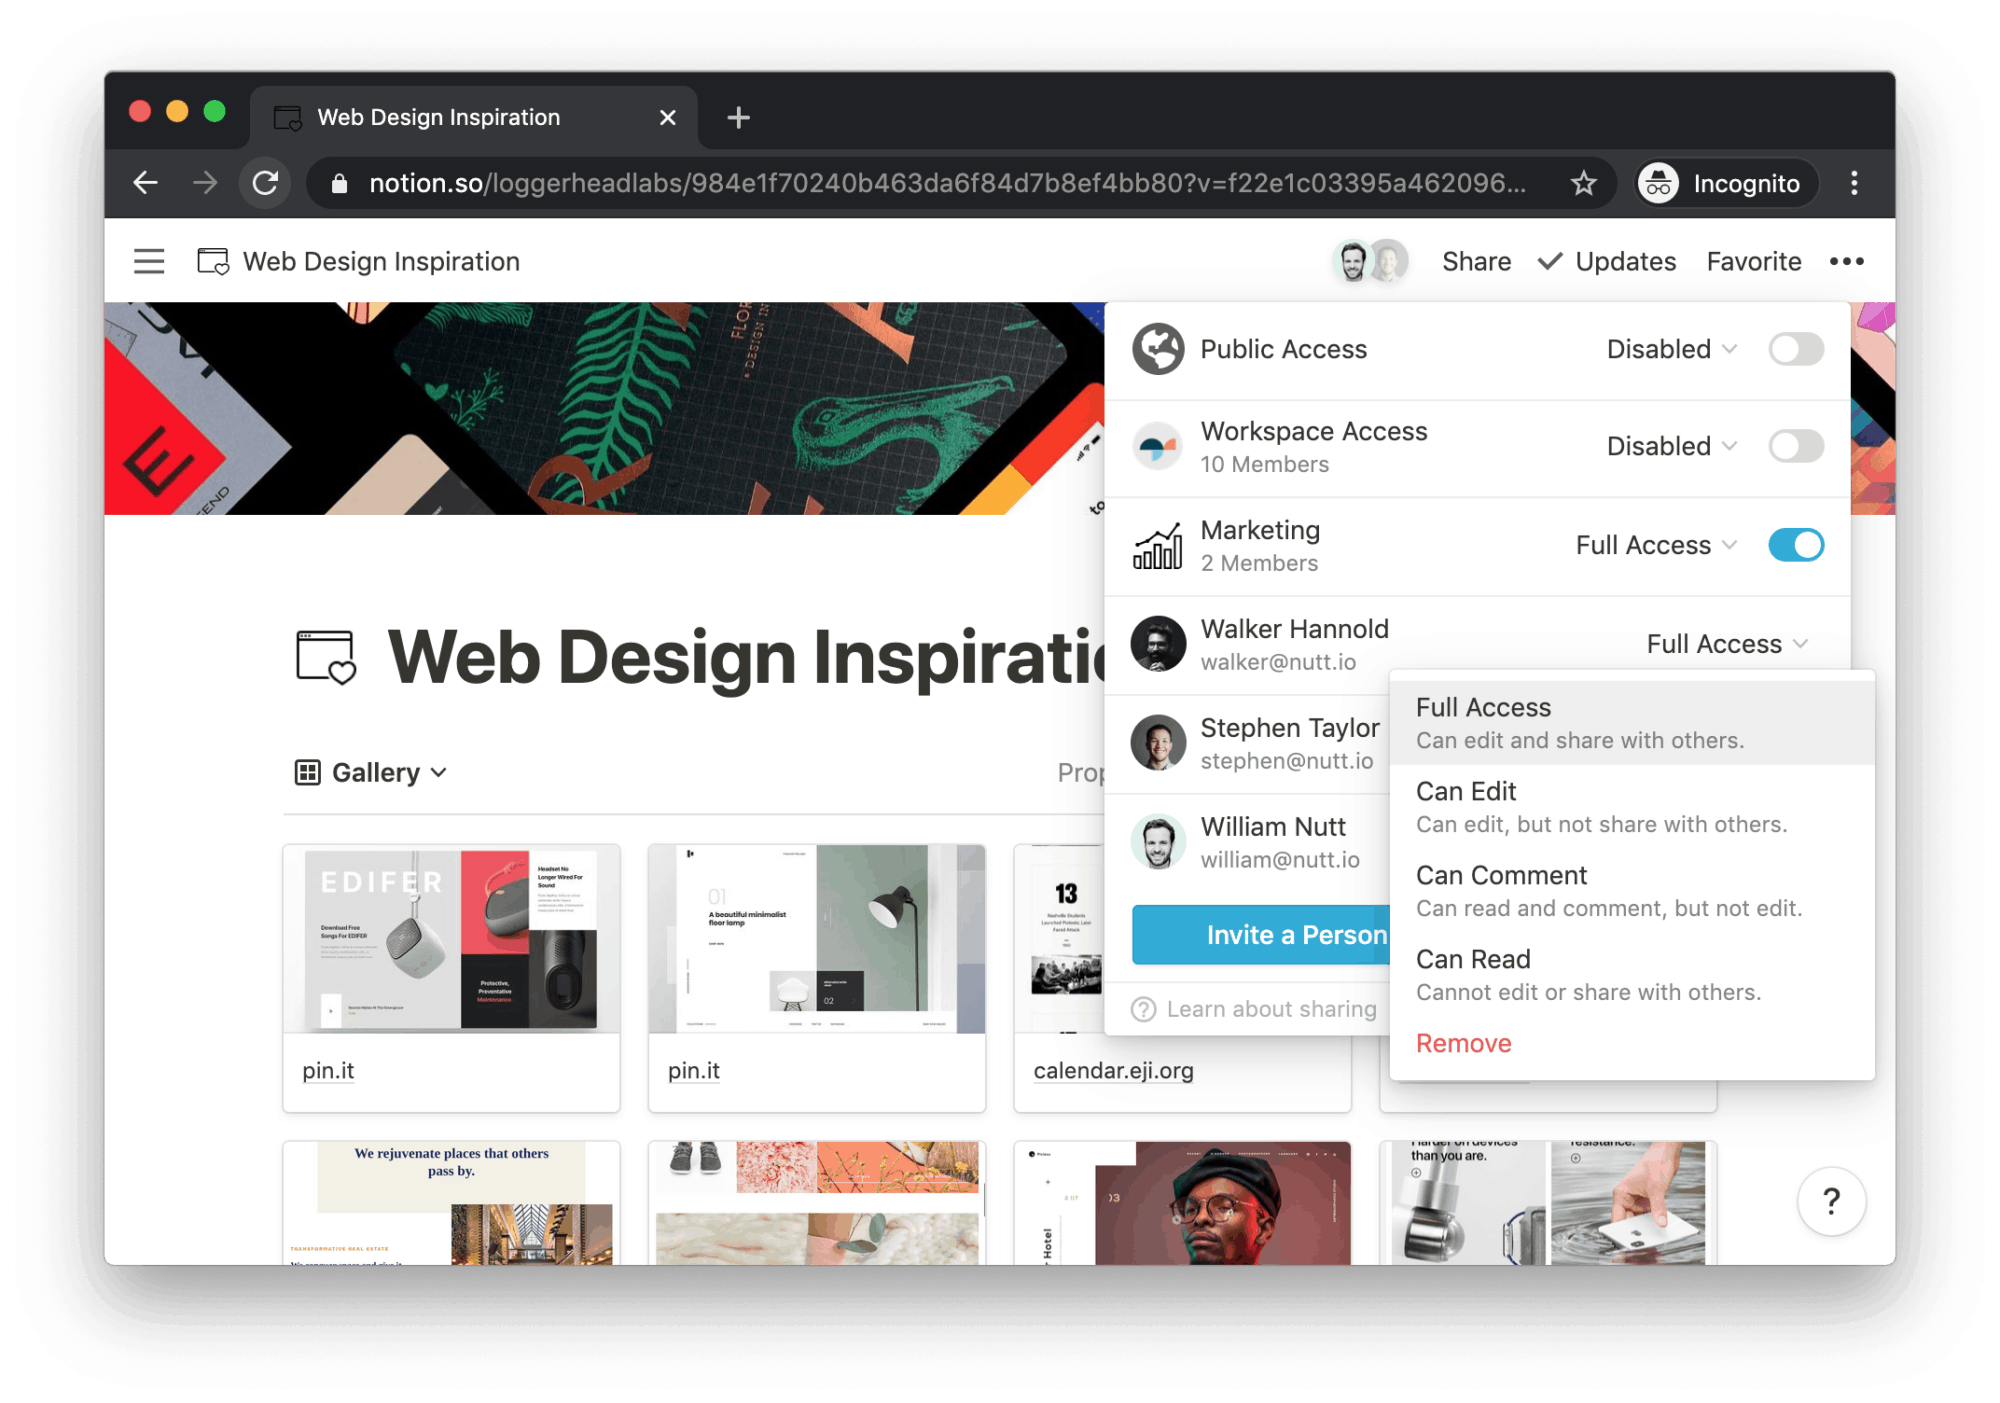
Along with groups, a page's guests and members appear within the Share menu. Each user includes a dropdown menu, where you can adjust the access level or Remove access entirely.
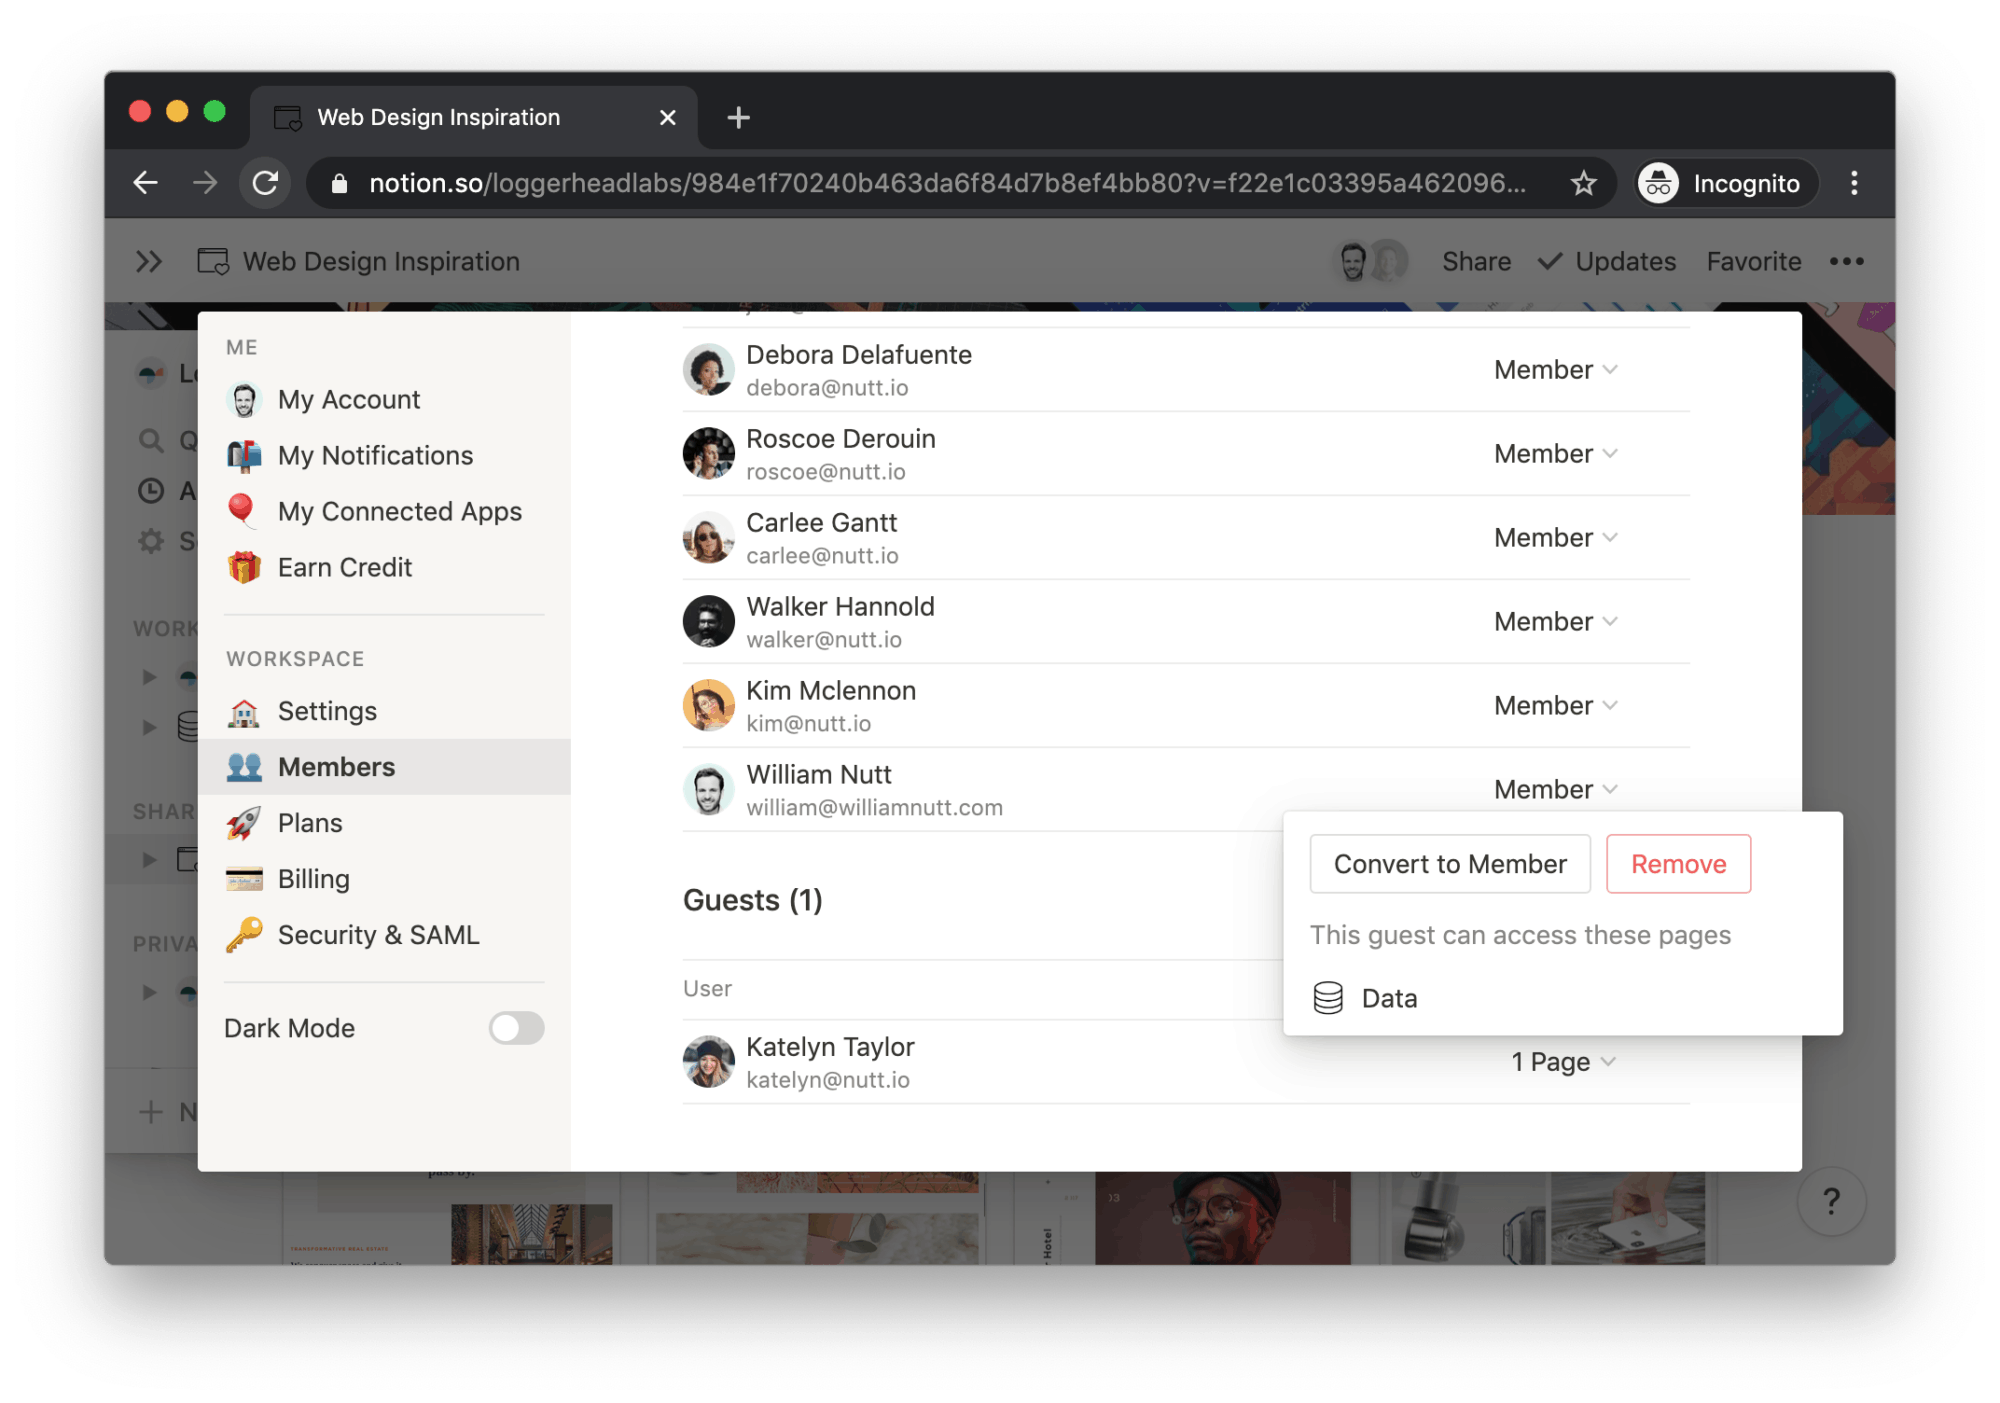
Within Settings & Members → Members, admins can see guests for all pages across the workspace. For each guest, a dropdown menu allows the admin to view the accessible pages, Remove the guest, or convert the guest to a member (on Team and Enterprise plans).
On Team and Enterprise plans, admins can manage workspace members within Settings & Members.
Settings & Members → Members, click Add a Member.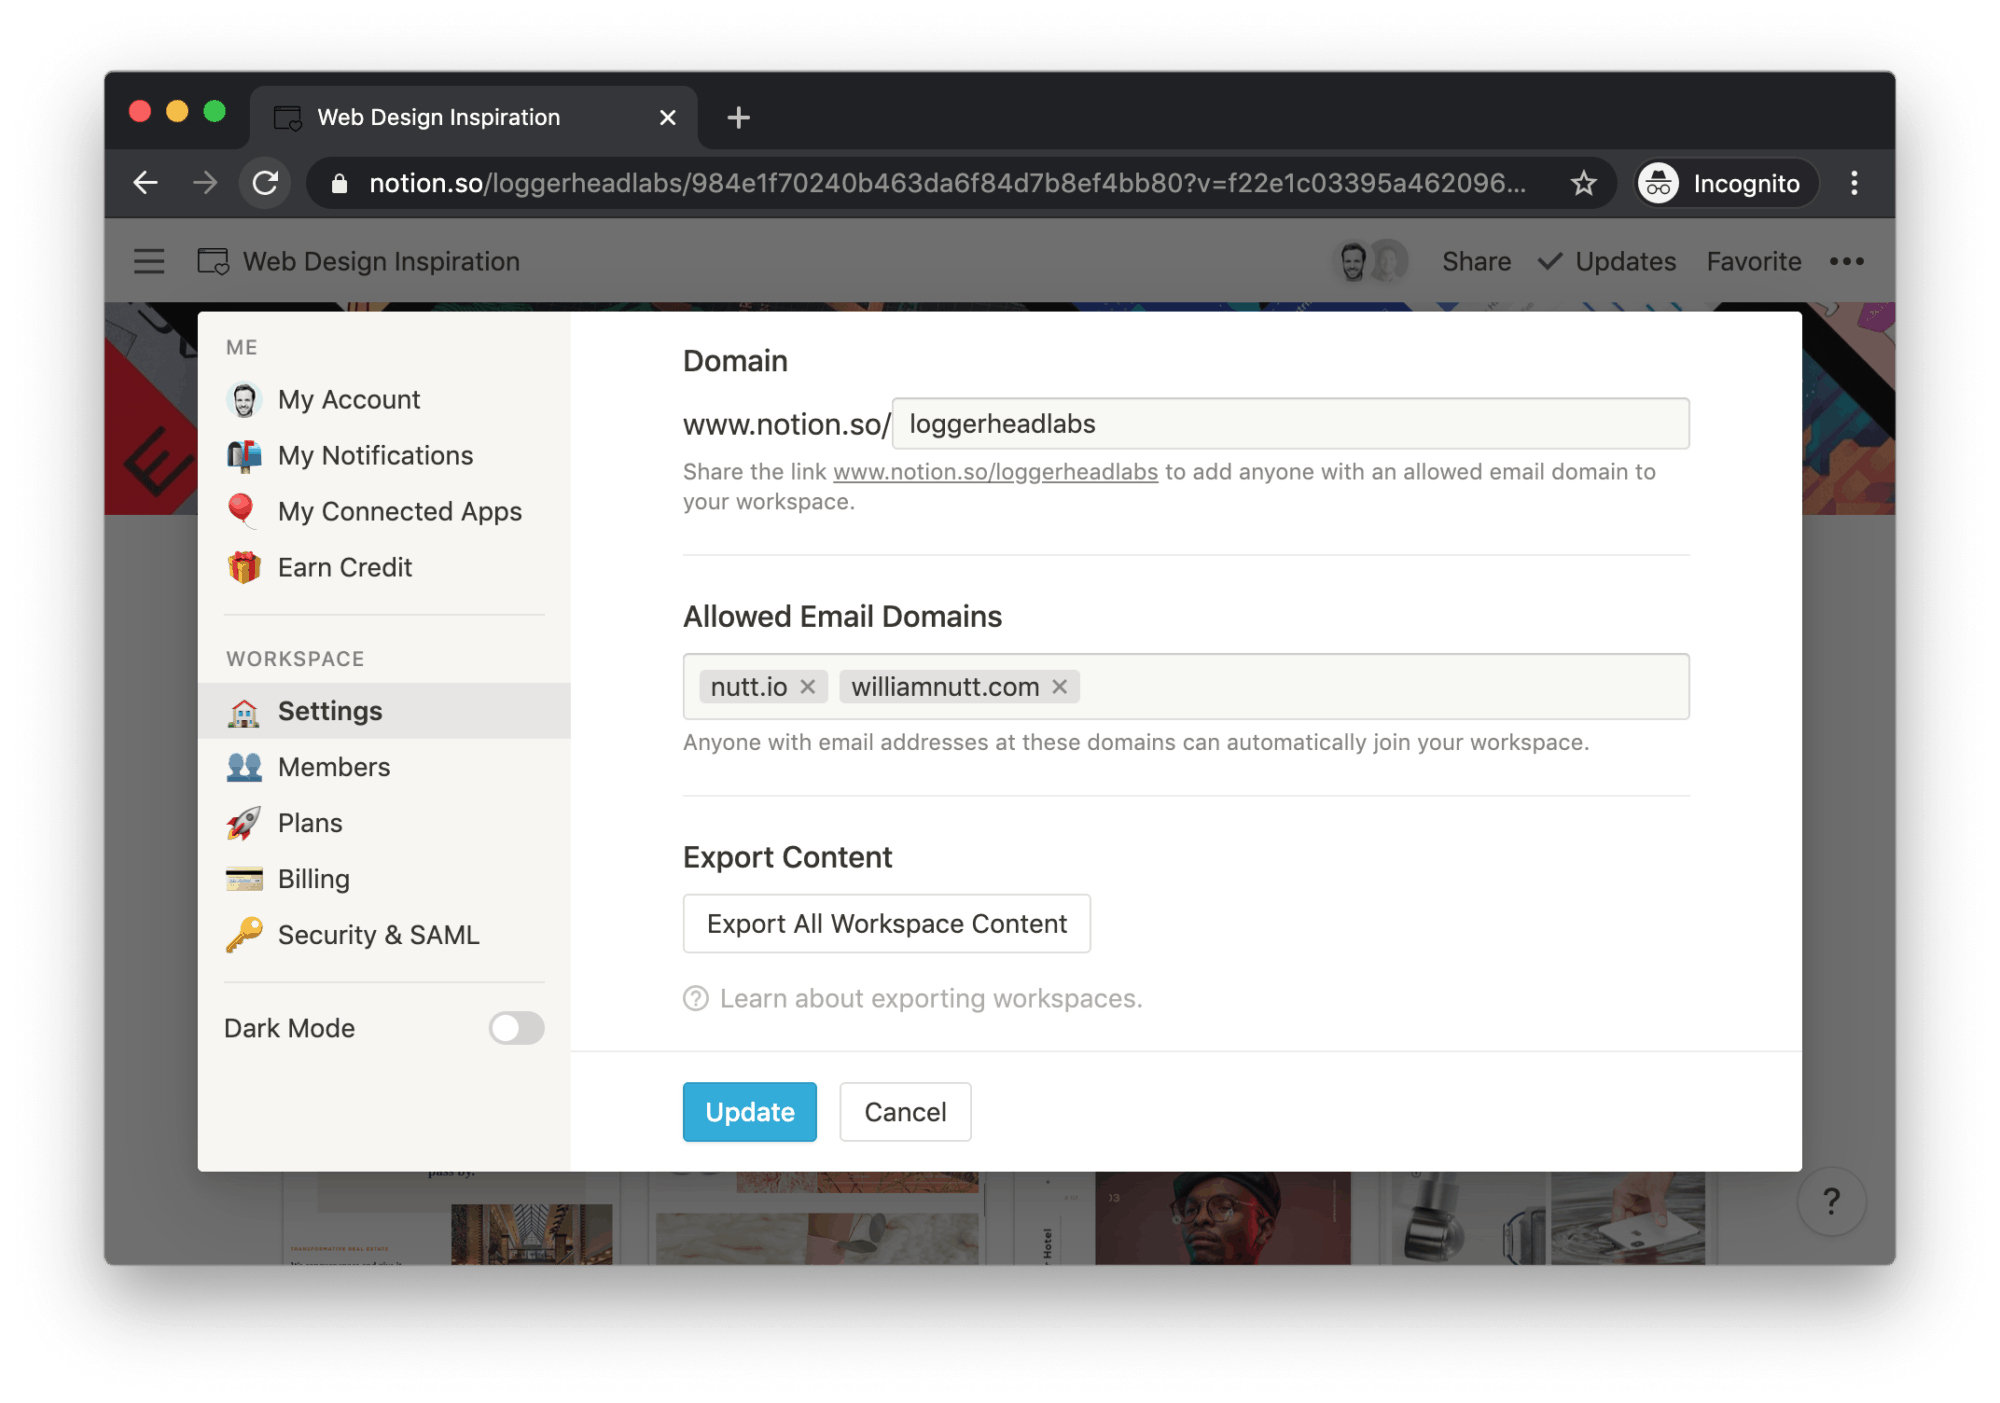
Admins can also allow any user with an email address containing an approved domain, e.g., company.com, to join the workspace. Enter your approved domains under Settings & Members → Settings → Allowed Email Domains.
With the domain configured, users with applicable email addresses will see the option to join your workspace when they create their account. Existing users can choose Create or Join Workspace from the the dropdown where they switch workspaces.
You can also share your workspace URL, which you can view and modify within Settings & Members → Settings → Allowed Email Domains.
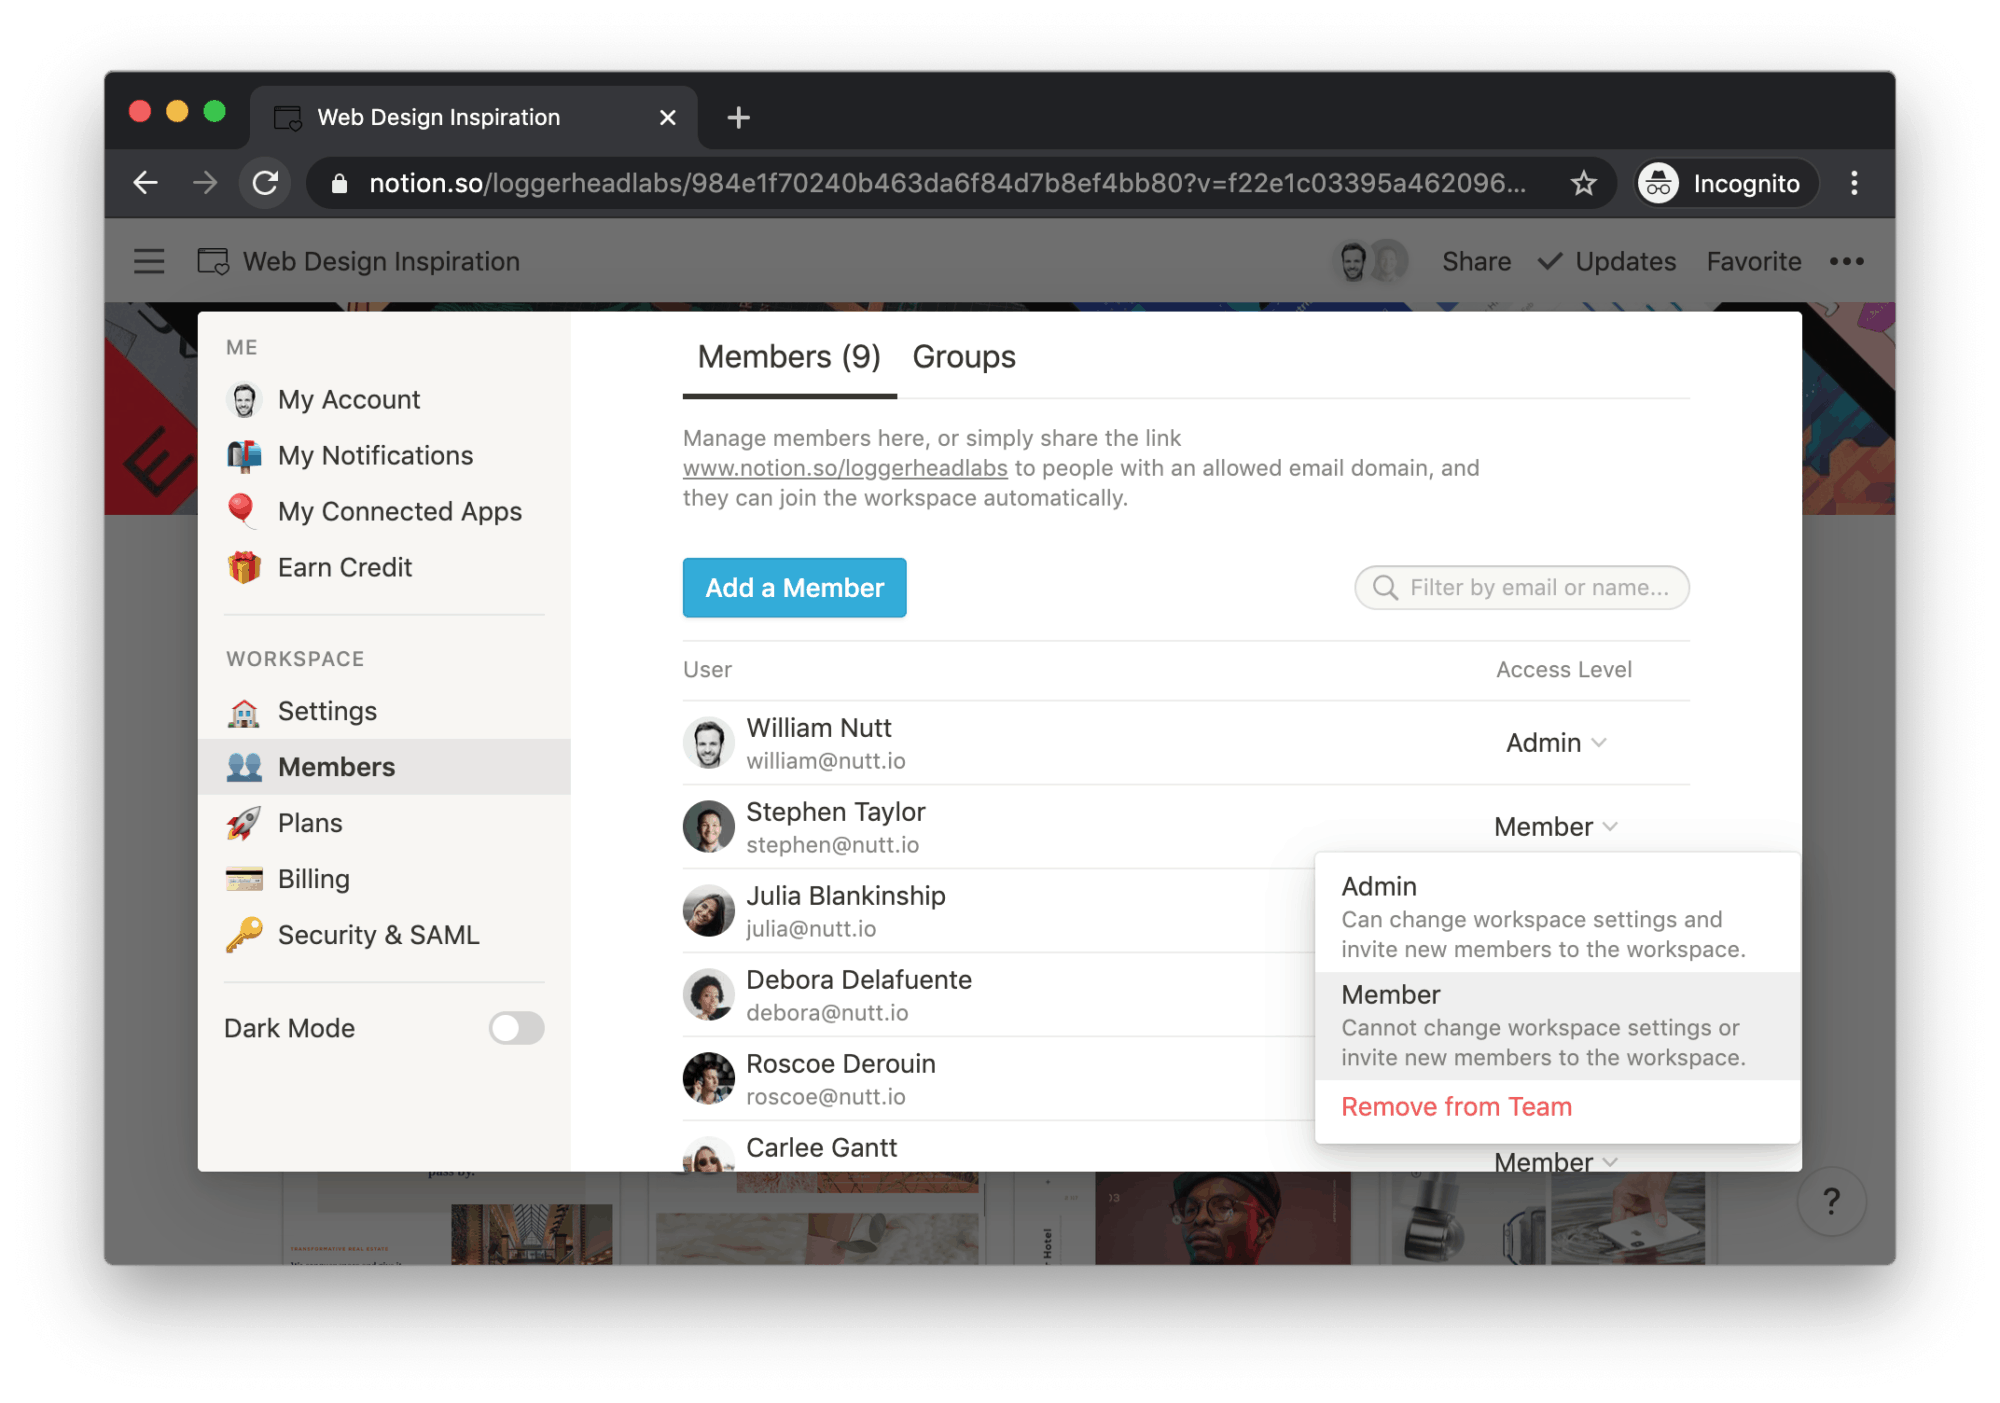
Within Settings & Members → Members, admins will see a list of existing members. For each, they can use a dropdown menu to convert the member to an admin or Remove from Team.

Admins can create and modify groups by clicking the Groups tab in Settings & Members → Members.
Create a Group.Add a member.Add.Next to the member, click Remove.
Next to the group name, click ••• and choose Rename or Delete.
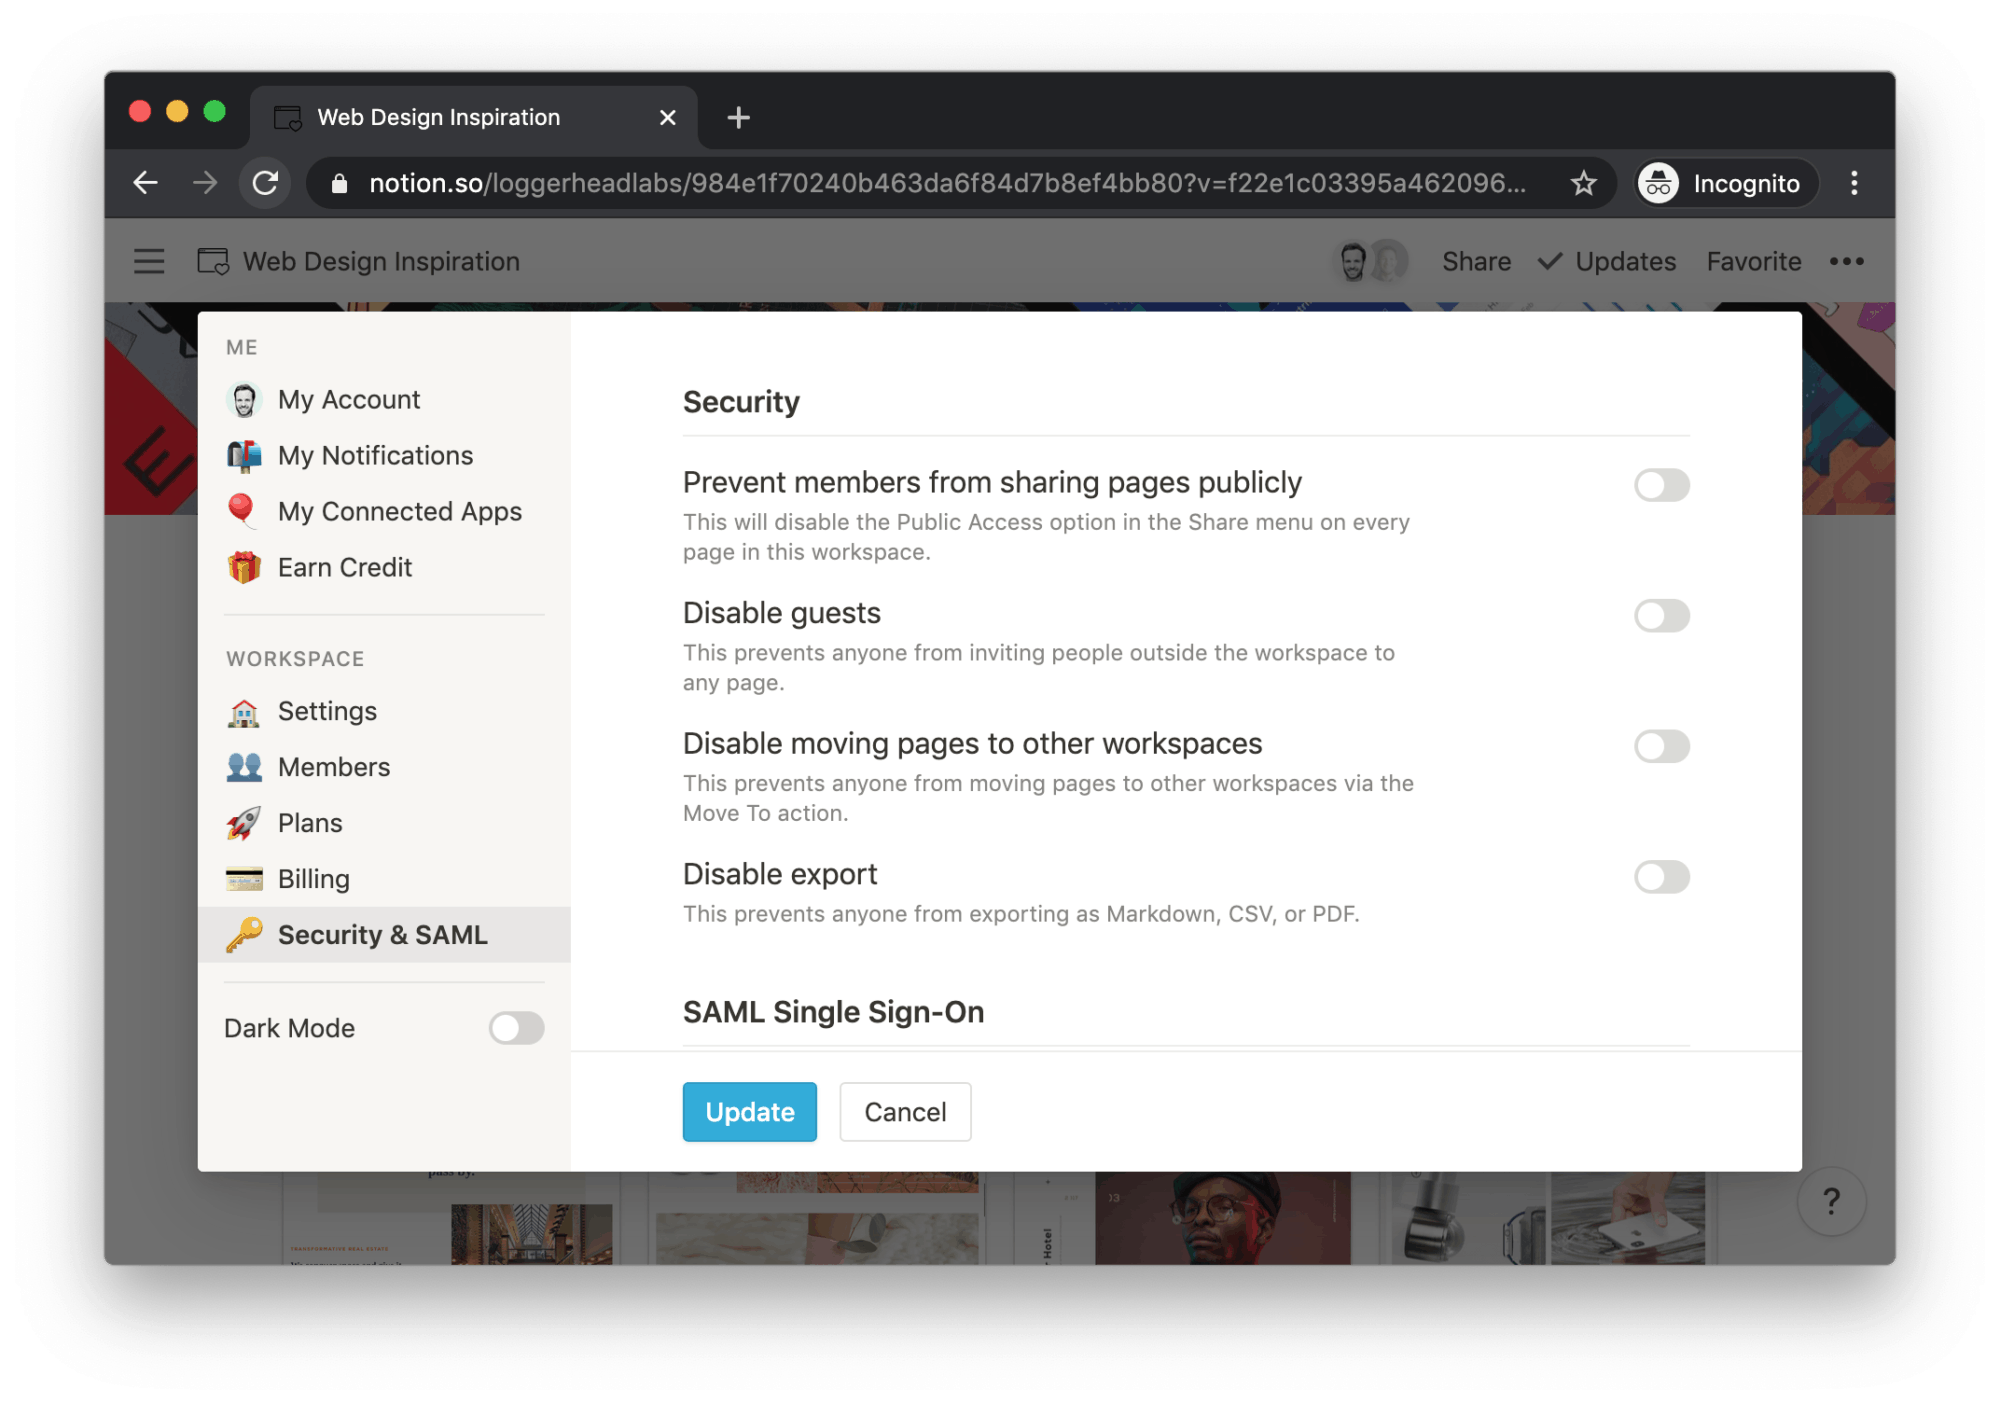
Admins also have the ability to disable particular share settings. Within Settings & Members → Security and SAML, they can:
That covers the full scope of the Notion Sharing Hierarchy. If you hit any roadblocks, we're just a tweet away.